Tagging Customers and the CRM Bulk Tag Tool
⏱︎ 3 minutes
What is Tagging?
Tagging is a way to help you search via specific data for customers. You can tag customers individually or via the Bulk Tag Tool, and then can use those tags to build a list that will show all customers with said tag.
What is the CRM Bulk Tag Tool?
This is a tool that will allow you to tag customers in bulk based on criteria such as Customer Details, Purchase Type, Purchase Date Range, or Individual Donations.
How do I tag my customers with the CRM Bulk Tag Tool?
1. From the department, on the left side menu, go to Customer Relationship Management → CUSTOMER BULK TAG TOOL.
2. Select your criteria using the the following filter options to narrow your data.

You can add multiple criteria to your search, or opt to search using just one filter.
Customer Details
Purchase Type
Individual Donations
Purchase Date Range
Customer Details
Narrow your customers using the following parameters:
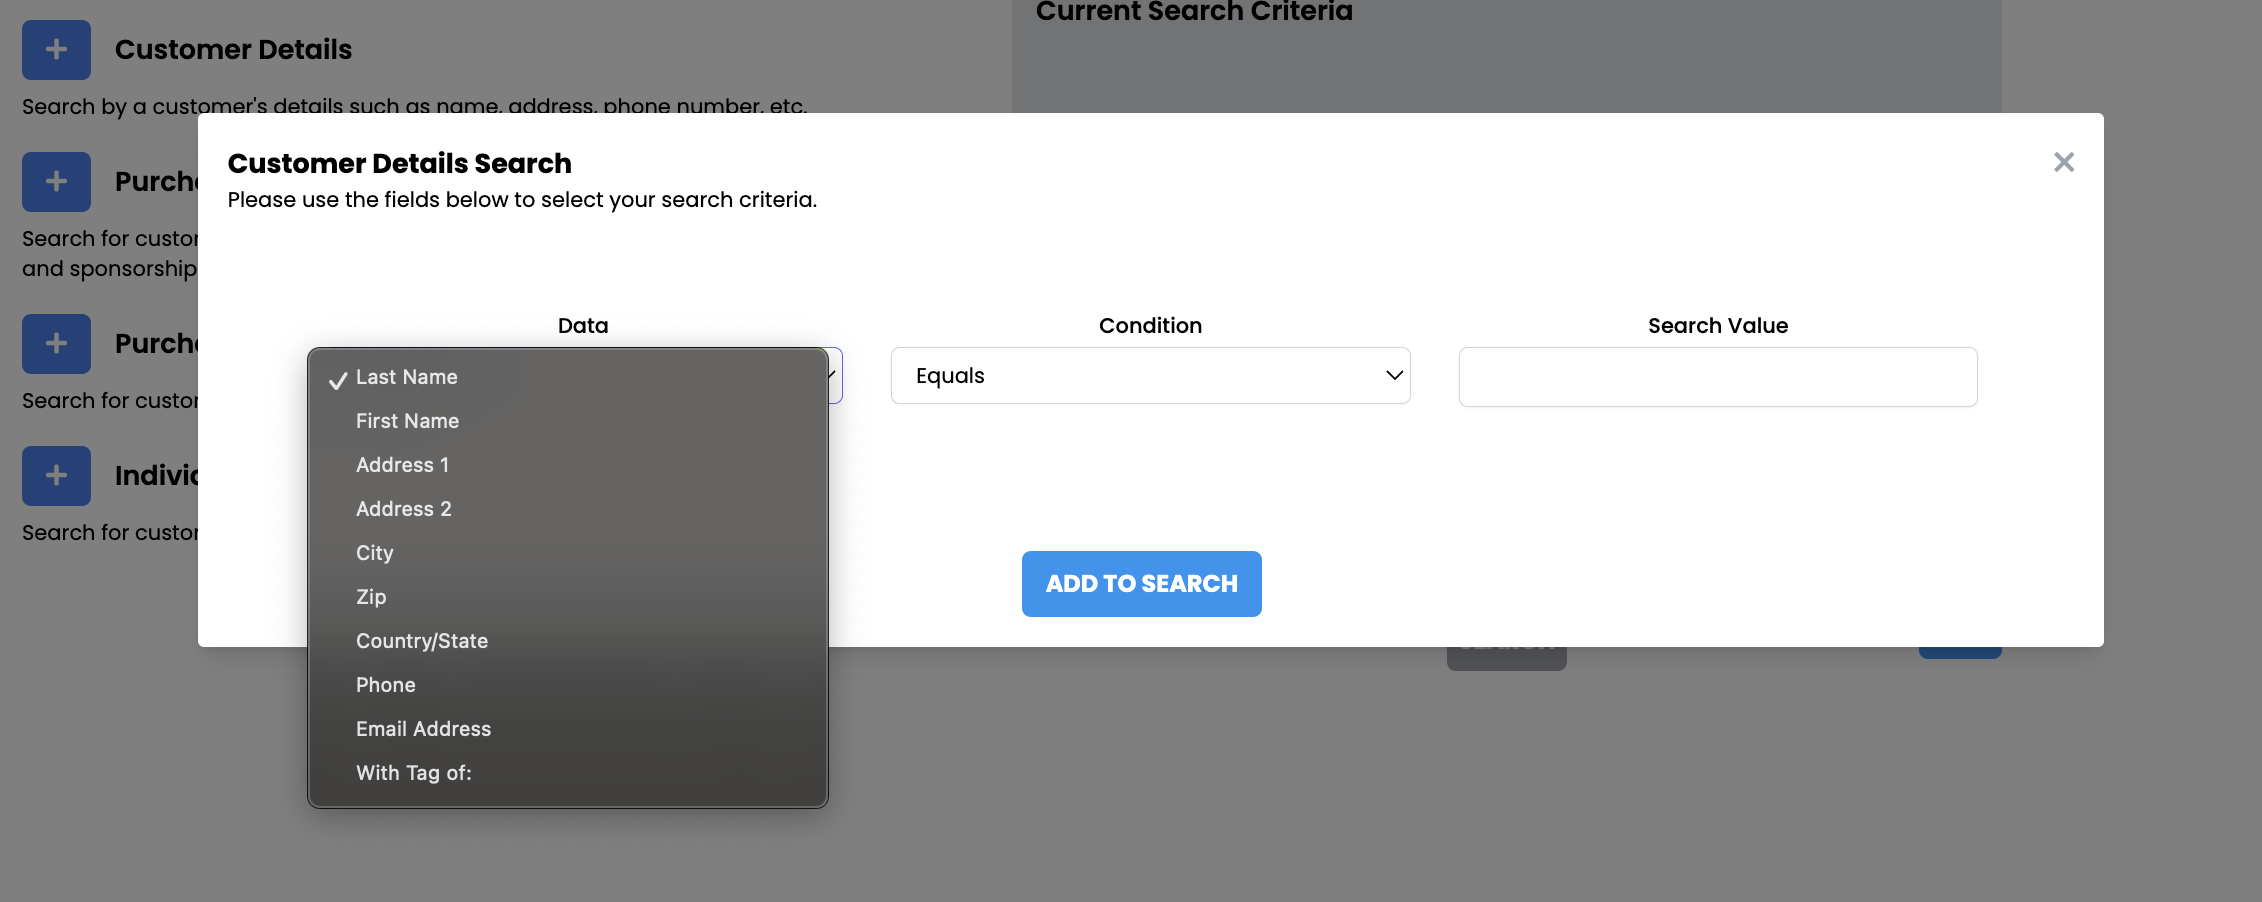
Data: Last Name, First Name, Address, City, Zip, Country/State, Phone, Email Address, With a Tag Of:
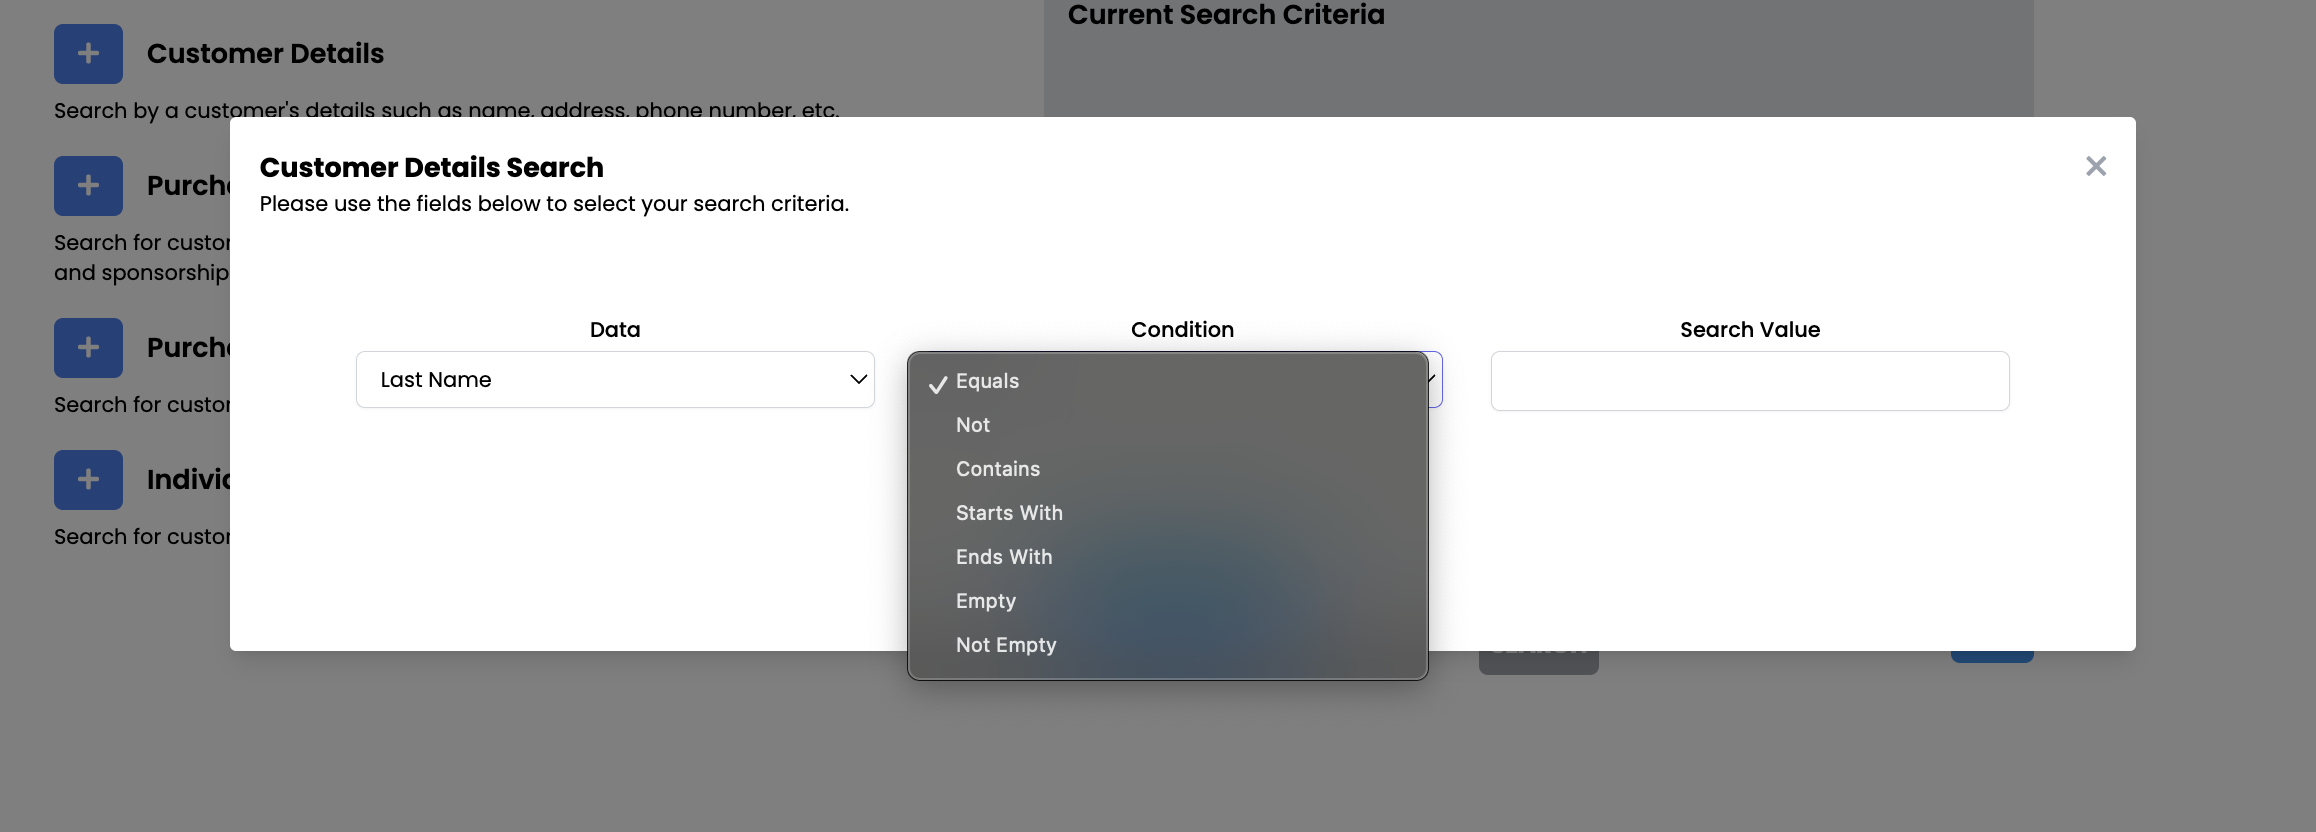
Condition: Equals, Not, Contains, Starts with, Ends with, Empty, Not Empty
Search Value: Enter your desired search term (For example: Last Name, Equals, Hamilton)
If finished with your search criteria, click the blue SEARCH button at the bottom to generate your list of customers to tag.
If finished with your search criteria, click the blue SEARCH button at the bottom to generate your list of customers to tag.
Purchase Type
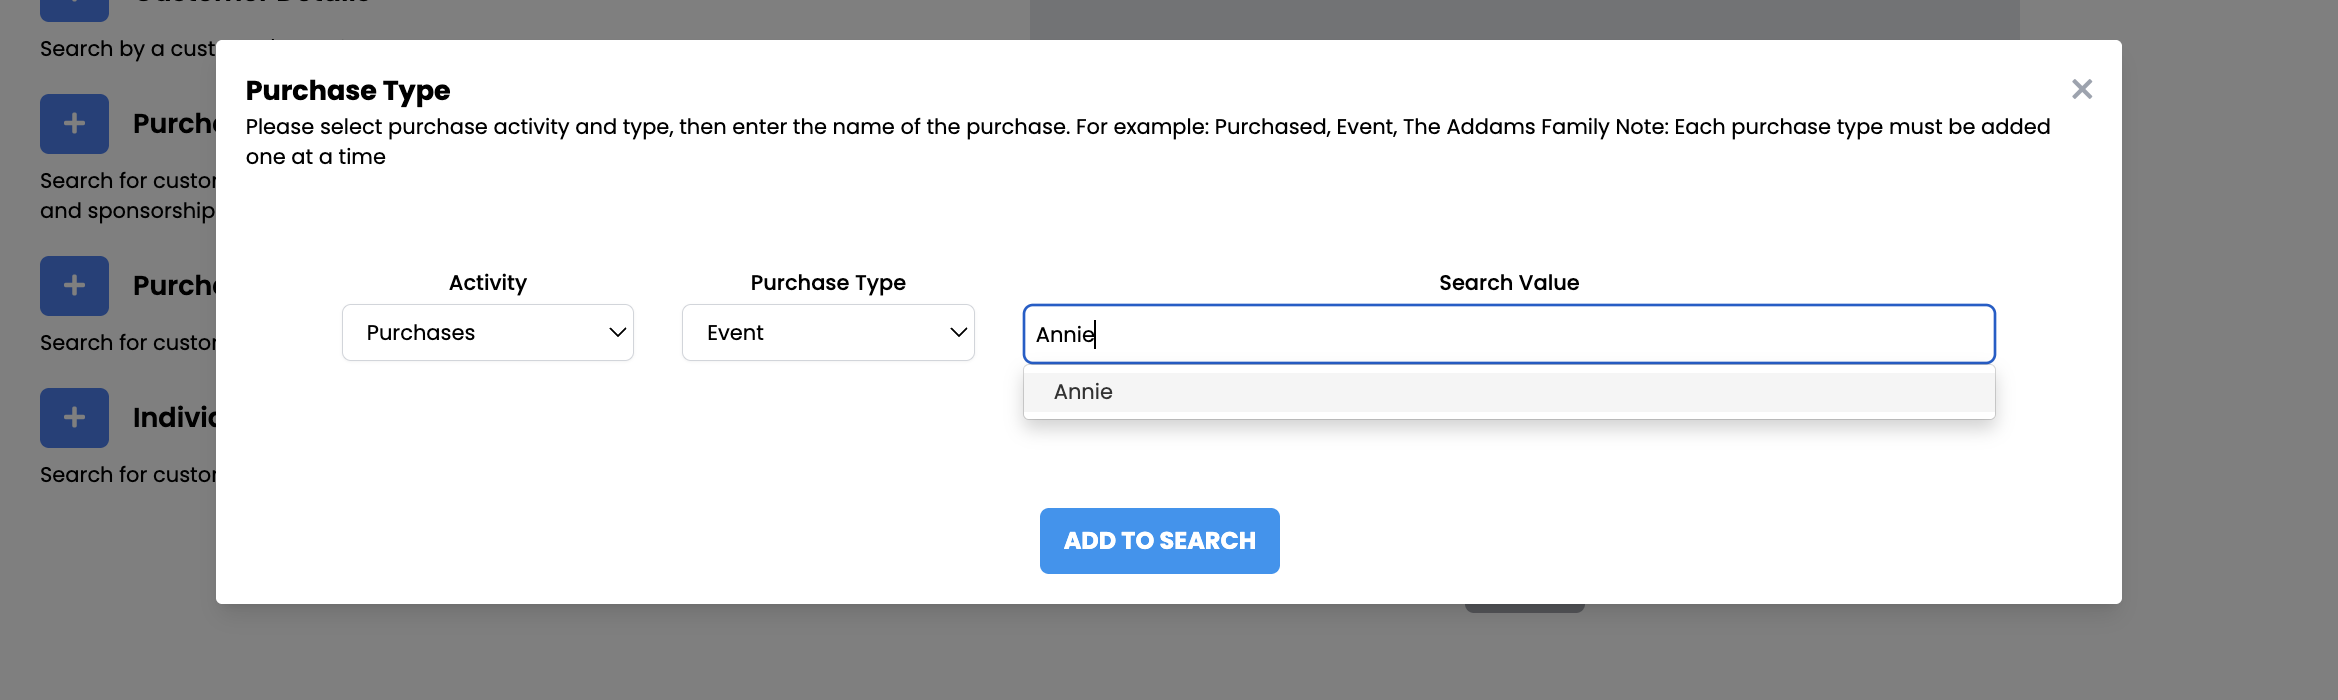
Narrow your customer search by the following purchase types:
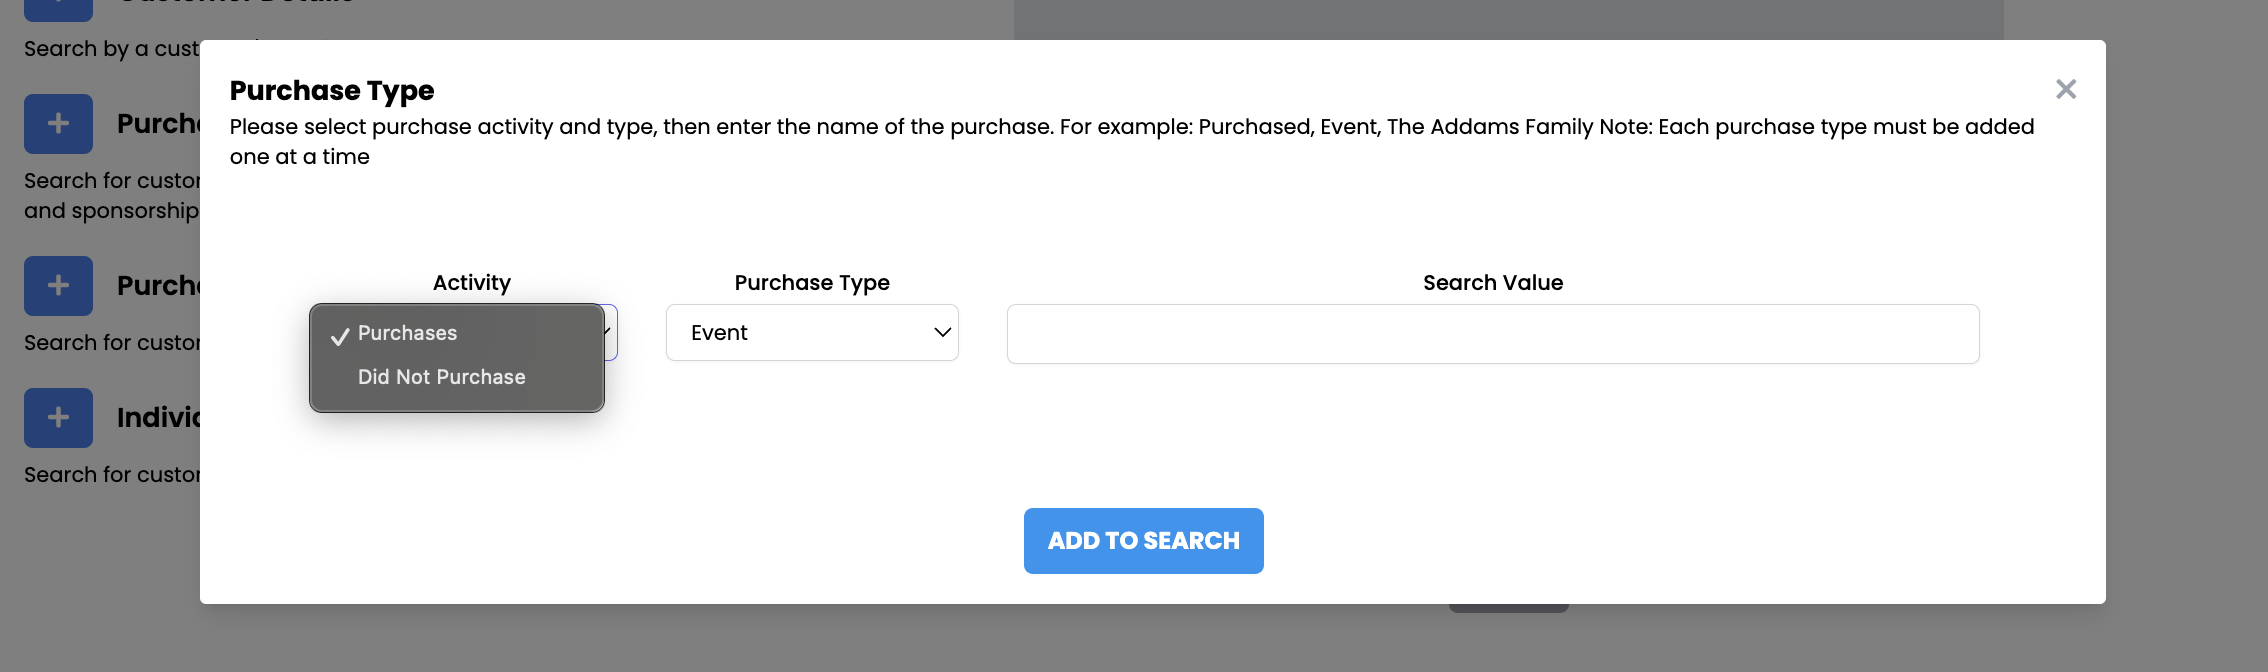
Activity: Purchases, Did Not Purchase
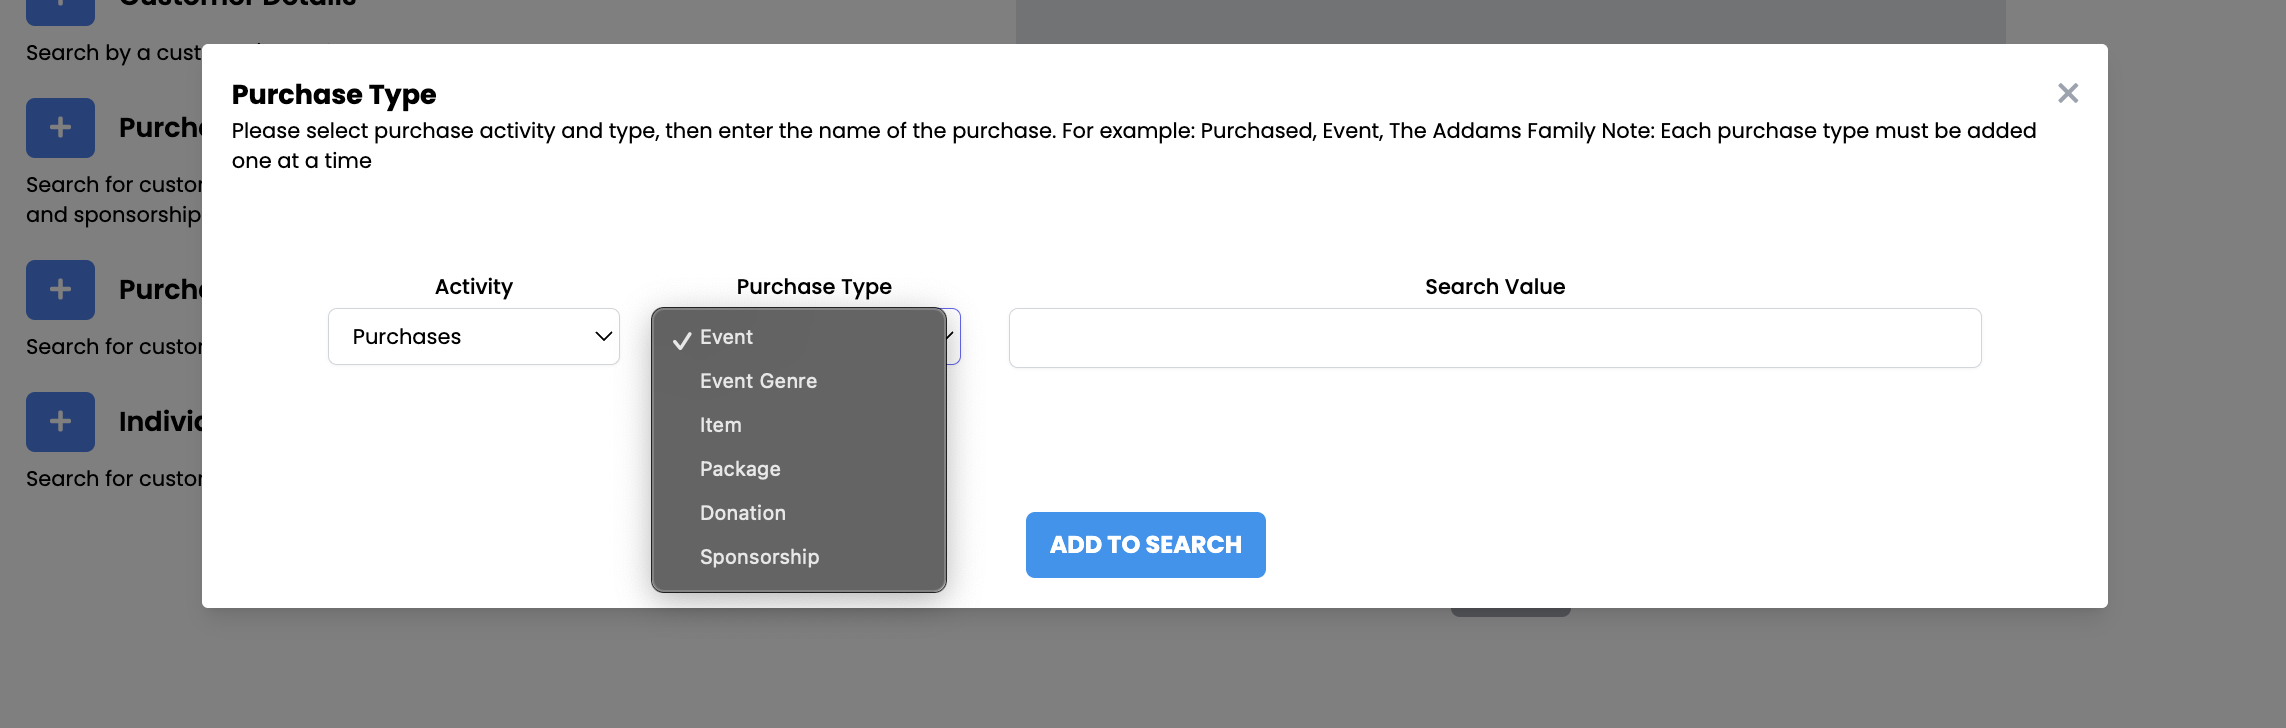
Purchase Type: Event, Event Genre, Item, Package, Donation, Sponsorship
Search Value: Enter your desired search term (For example: Purchases, Event, Annie)
Individual Donations
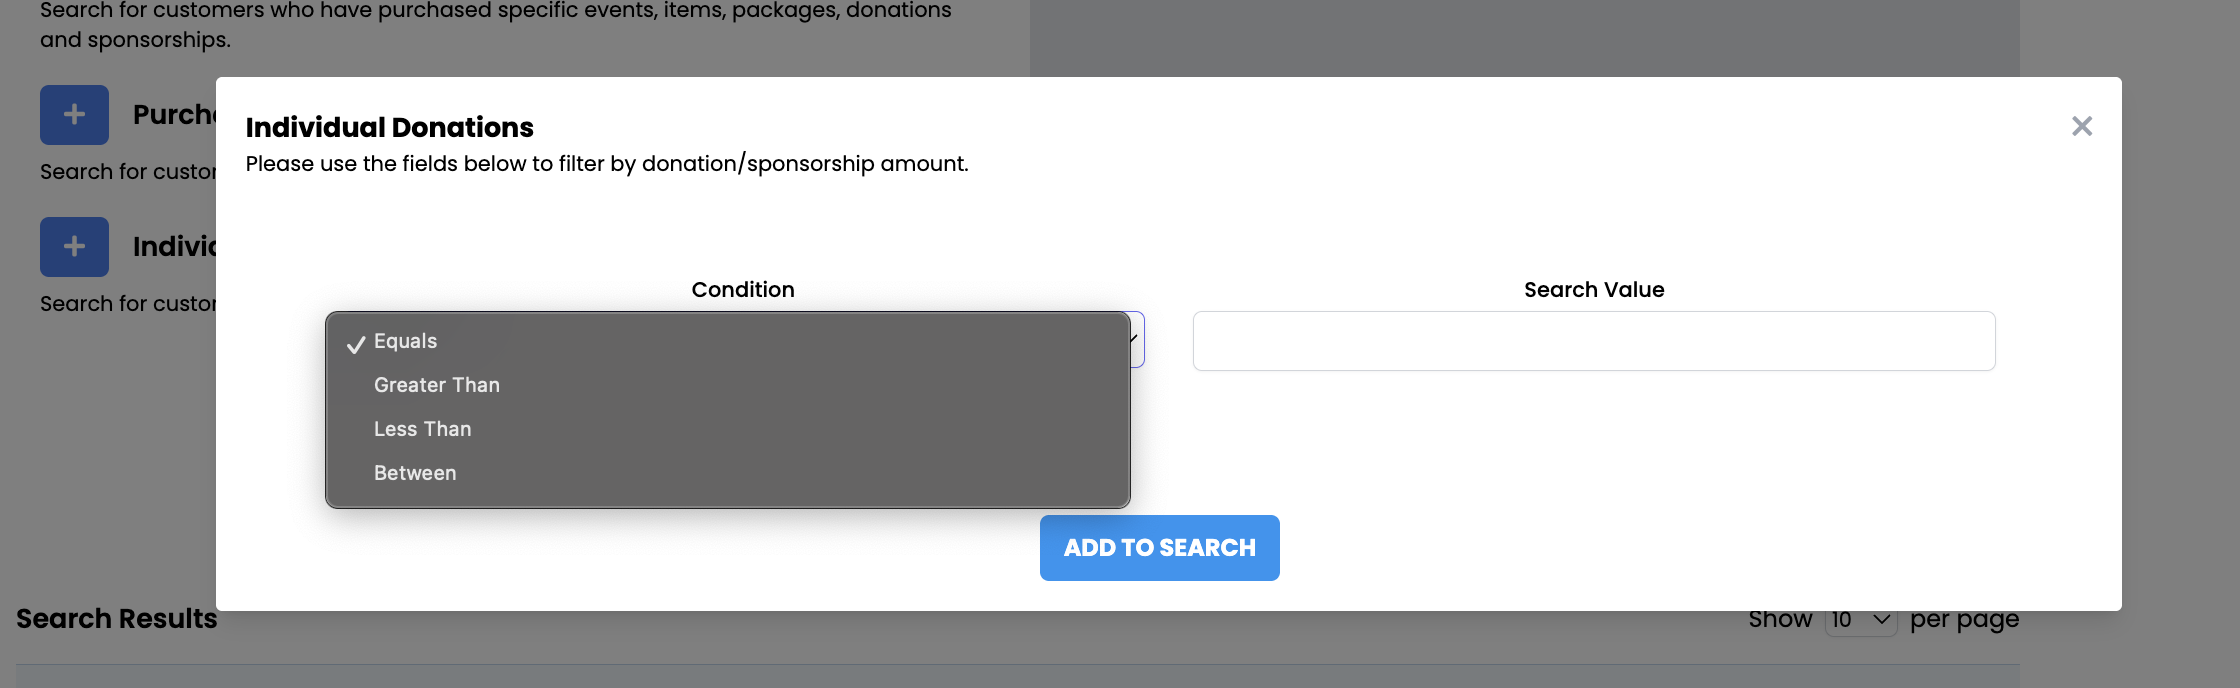
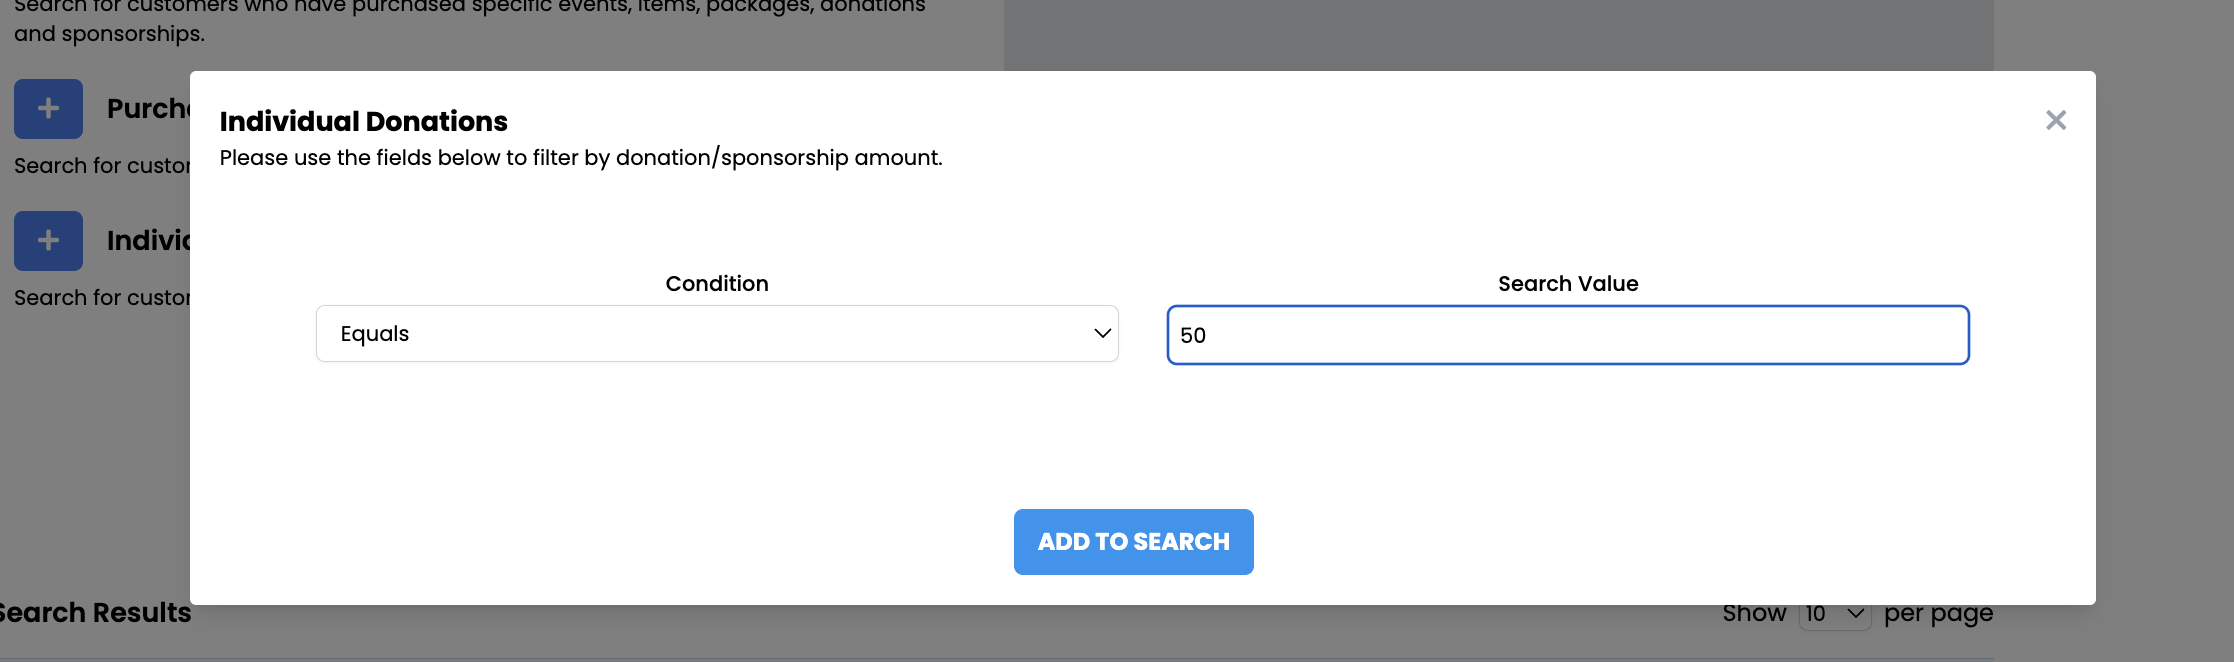
Narrow your customer search based on individual donation or sponsorship amount:
Condition: Equals, Greater Than, Less Than, Between
Search Value: Enter your desired amount (Enter "50" not "$50.00" - No special characters necessary)
Purchase Date Range
Narrow your search within a specific date range of purchase:
Purchase Type: Order, Event, Item, Package, Donation, Sponsorship
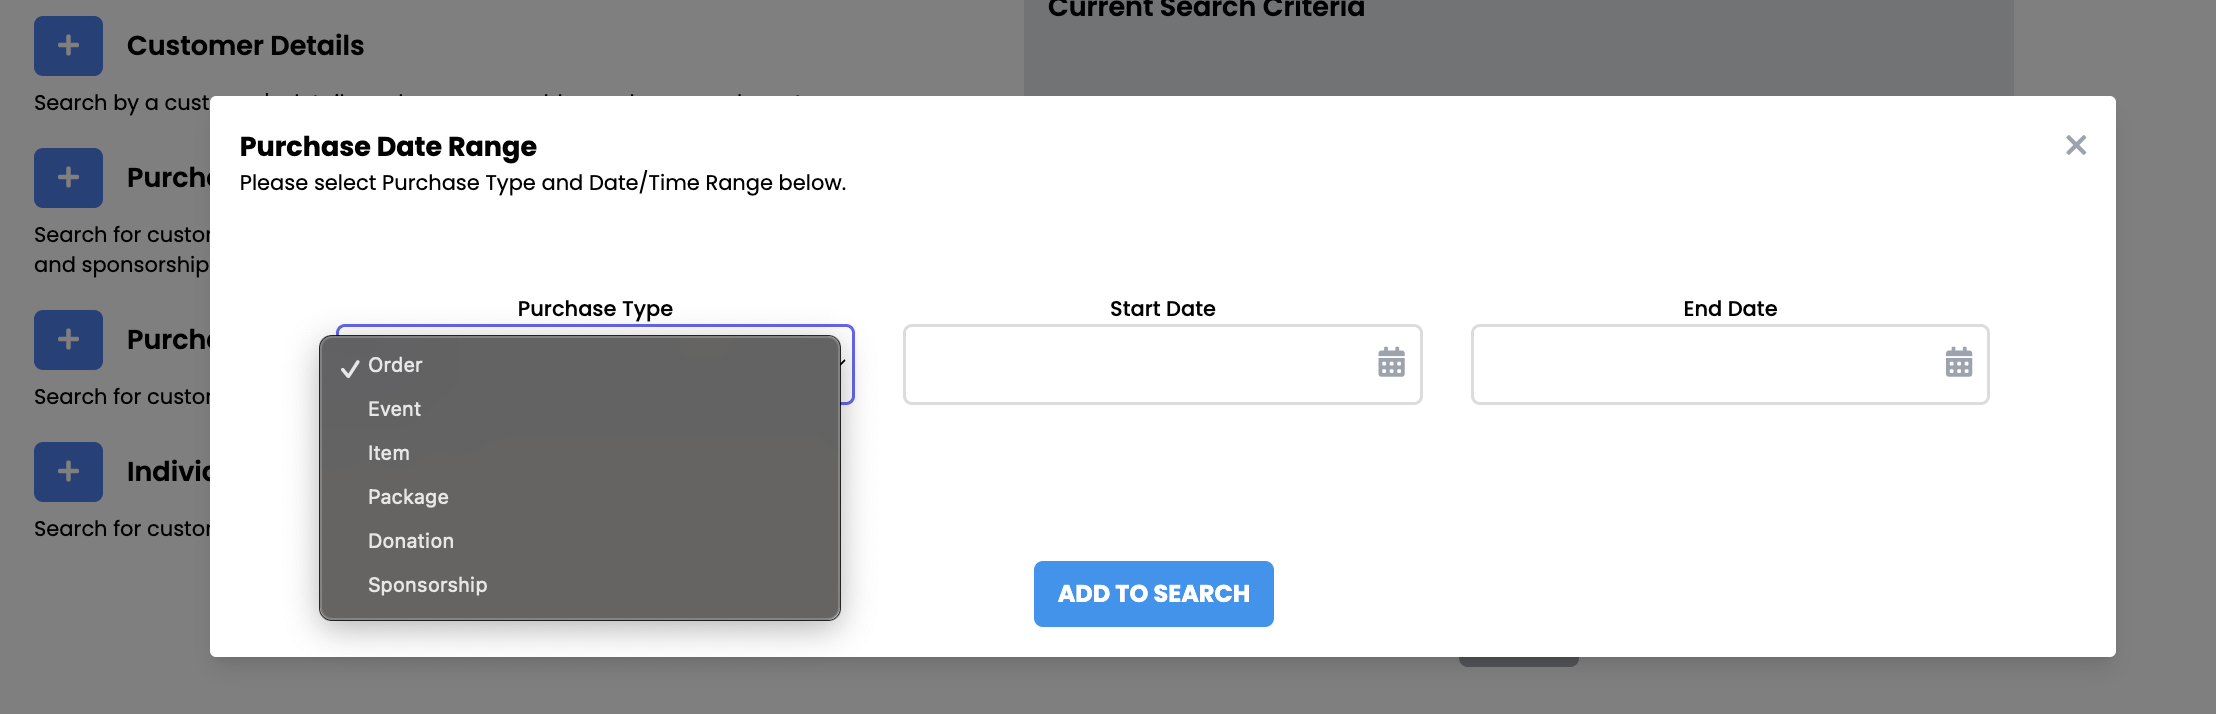
Start Date & End Date
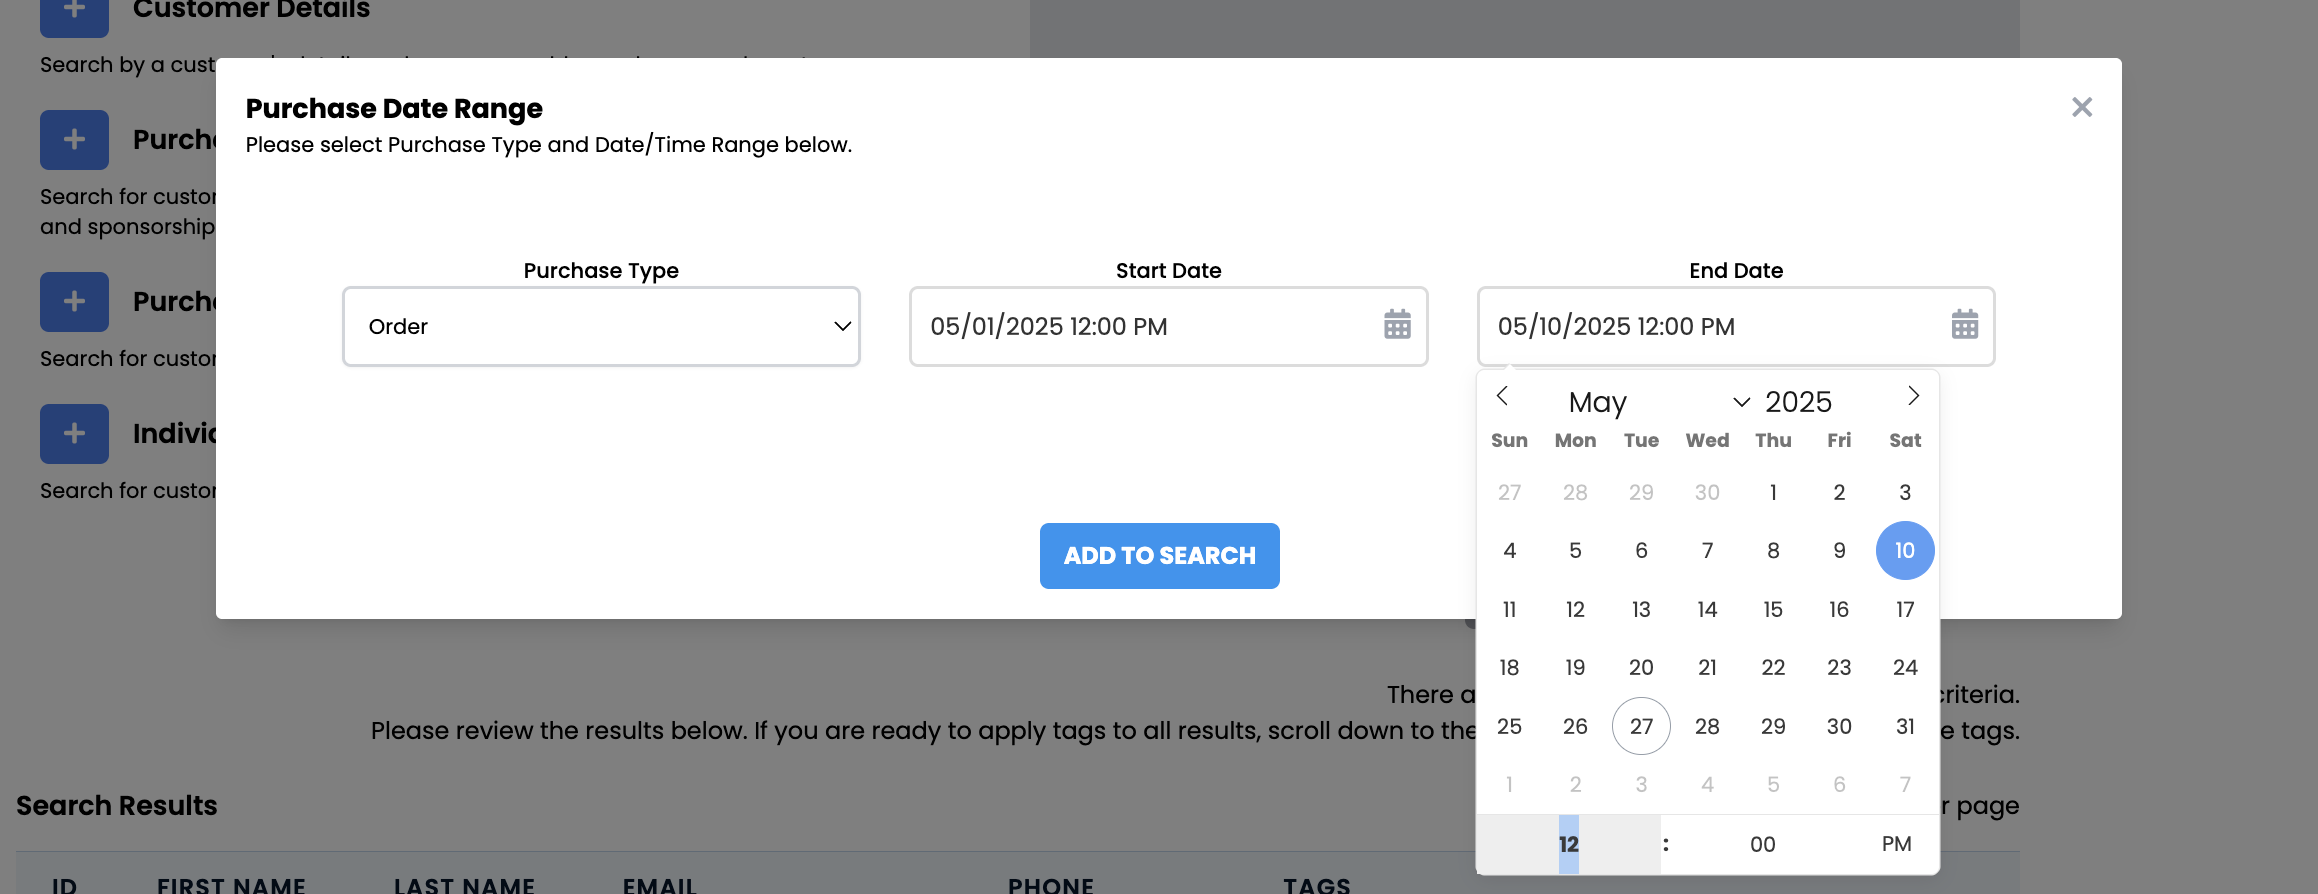
3. Once you have filtered your customers, click the blue SEARCH button to generate your list of customers to tag.
4. Below the search results, enter the Tag you wish to use, then click APPLY TAGS.
5. Confirm that you are ready to apply your tags by clicking APPLY TAGS NOW.
6. You have successfully tagged your selected customers!
How do I Remove Tags?
Using the same parameters as above, you will simply use the drop down to select "Remove Tags" instead of applying tags:
How do I Tag Customers Individually?
1. Log in and navigate to your department.
2. On the left side menu, go to Customer Relationship Management→ CUSTOMER SEARCH TOOL.
3. Search for the customer.
4. Click ACCESS ACCOUNT under Log In Accounts.

You cannot tag a customer with a guest account.
5. Under the TAGS header, click:
ADD TAGS if the customer doesn't have any existing tags | PENCIL ICON If the customer has existing tags |
6. Enter the tag and then click SAVE.