Scanning Tickets
⏱︎ 3 minutes
Scanning tickets is how you can check in customers when they arrive at your event.
There are two scanning options - using a handheld scanner in conjunction with the website, or using a scanning app.
You can scan tickets from paper or from the customer's phone.
Handheld Scanning
1. Acquire a QR Code scanner, or purchase a recommended one.
2. Plug the scanner in to your computer.
3. Open up the scanning page by accessing your department, and then under Box Office Manager, click TICKET SCANNING.
Testing the scanner
If you are testing the scanner for the first time, you can follow the following steps using the PDF Test Ticket on the top right, while looking at any of your event dates and times. This will not affect the existing event!
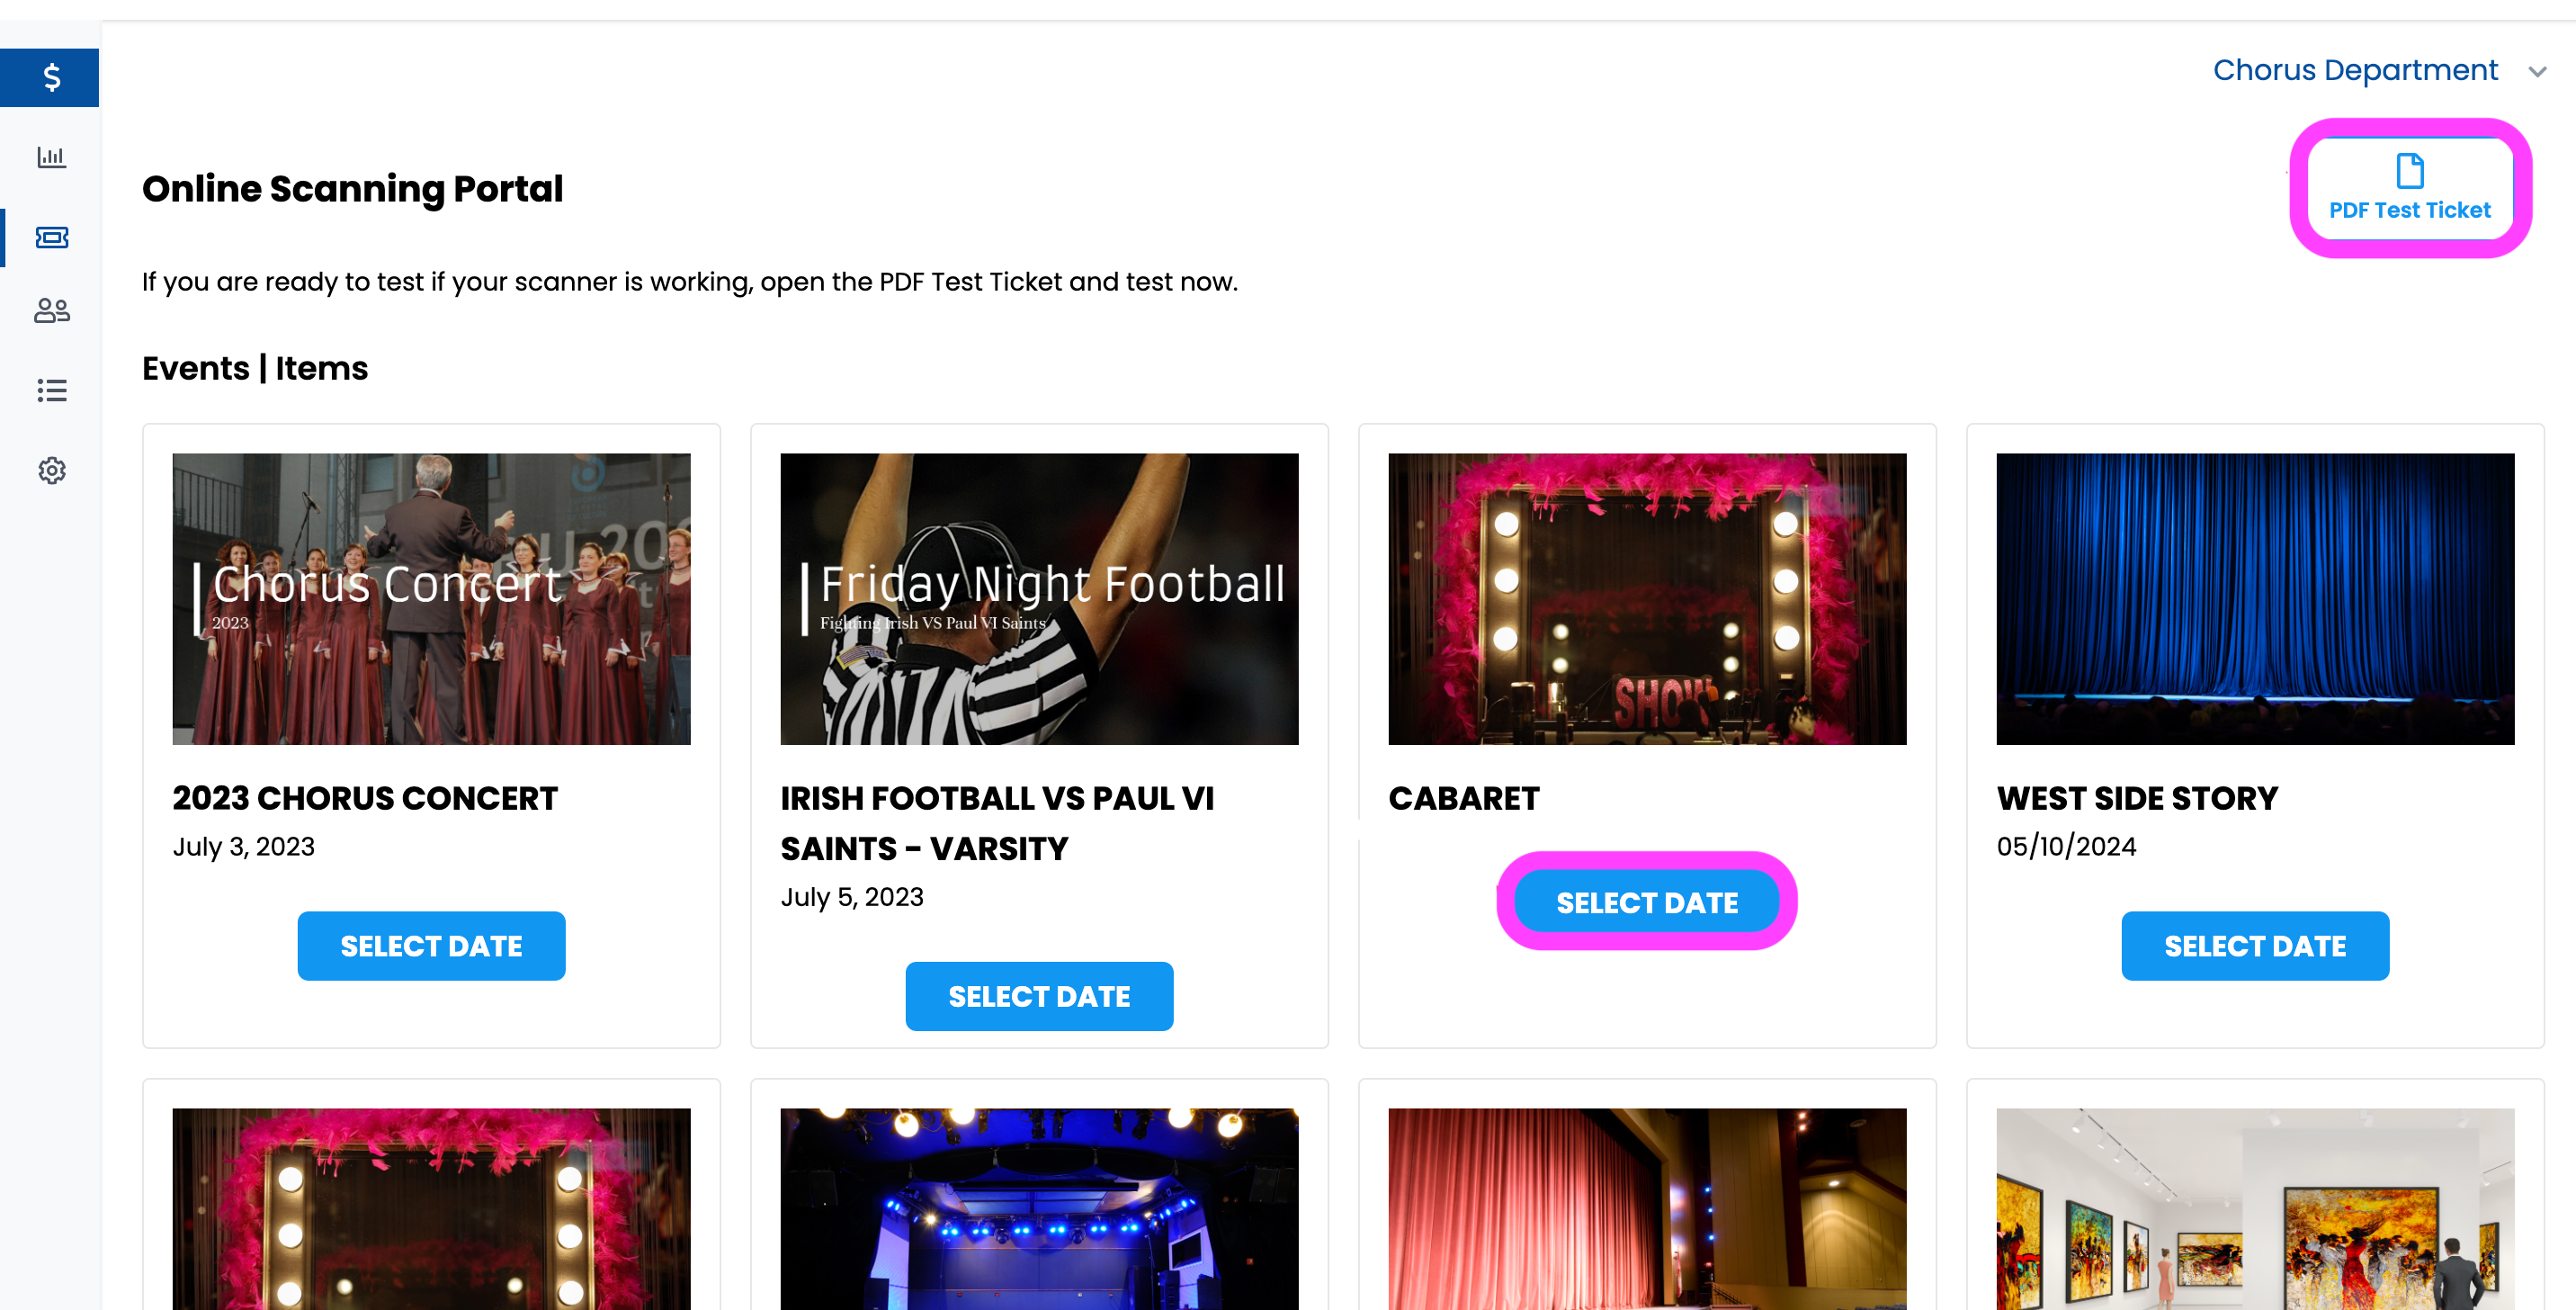
4. Click SELECT DATE on any your event.
5. Click SCAN.
6. When you arrive on this page, the cursor will be in the textbox, or click into the box if needed.

You will see the blinking line within the box to know you are ready to scan.
If you are using the testing tickets...
Point the QR code scanner at the QR code, and press the trigger to scan.
The scanner will beep when it has read the QR code, and will show you either a valid mark or an invalid mark.
NOTE: This test QR code will work either from a paper print out or from a screen.
NOTE: This test QR code will work either from a paper print out or from a screen.
7. Point the QR code scanner at the QR code, and press the trigger to scan. The scanner will beep when it has read the QR code, and will show you either a valid mark or an invalid mark.
And you have successfully scanned tickets! You do not need to clear the messages, simply continue to scan tickets as needed.
Scanning App
2. Open the app and log in using your username (email address associated with BookTix) and password. 3. Enter your client ID (ie DEMO of demo.booktix.com) 4. Press SUBMIT. 5. Select your department and the app will take you into the next page. | ||
 Here you will see two tabs- events and items. Within each, you have a tab for public and private. These will show you events and items that are currently available to the general public vs. events and items only sold through the point of sale tool. 6. Navigate to the tab you're looking for, and tap the image of the associated event or item. | ||
7. Tap the DATE MANAGER on the bottom right. | ||
8. Select the date and time for which you would like to scan. | ||
9. Here, find the statistics for this specific event date. Look along the bottom are the Patron List and Scanning options. | ||
10. Choose if you would like to scan QR Codes, or Manually Check In customers Manually Check In Customers a. Tap PATRON LIST. b. You will see orders that are ready to be scanned or orders that have already been redeemed. c. Tap the order number. d. Tap the blue READY box on the tickets in the order that need to be "scanned in". NOTE: If you need to unredeem a customer's ticket, go in to the redeemed tab and find their order there. Then, you can tap the gray REDEEMED box on the ticket to unredeem it. 11. To proceed with scanning QR Codes, tap SCAN. | ||
12. This scanner uses the camera to read the QR code. Press ALLOW in order to continue. | ||
13. Center the QR code within the scanning box. The scanner will automatically read the information. If the scan is successful, it will present a green box over the screen, and if it fails, it will present a red box. Should you need more light to scan the QR codes, tap the flashlight on the top right. | ||
14. When a scan is successful, the screen will present like this. | ||
15. When a scan is unsuccessful, it will present like this. |
And you have successfully scanned tickets! You do not need to clear the messages, simply continue to scan tickets as needed.
Related Articles
Alternatives to Scanning
⏱︎ 1 minute Instead of scanning, you can rip stubs on hard tickets and collect online tickets, or download and print out a list of all purchased tickets to verify purchases, or use the manual check in option within the site. To use the manual check ...BookTix Equipment Options
⏱︎ 1 minute BookTix is cloud based and is best used on a computer or tablet. All additional equipment options are optional in the BookTix system. If you choose to print physical tickets or scan tickets at the door, there are a variety of printer and ...Pay What You Can Tickets
⏱︎ 3 minutes Pay What You Can (or PWYC) is a ticket type that allows customers to select the amount they would like to pay for that specific ticket. Setting Up Pay What You Can Option 1. Log in and navigate to your department. 2. On the left side ...Exchanging Tickets in a Package
⏱︎ 1 minute If a ticket was booked via a package, it's exchange must be done within the package itself. 1. Access the order containing the package you want to edit. 2. Scroll down and click the REDEEM PACKAGE to take you to the event list for ...Paper and E-Tickets
⏱︎ 1 minute When a customer purchases a ticket or when you sell a ticket in the point of sale tool, a unique QR code is created for that specific ticket. That QR code then can be presented in various ways - when a customer purchases, they'll see an ...